ORTHODOX
Introduction
In this post, I’ll share the journey of building my custom ortholinear keyboard, from initial design to final assembly. The project incorporates analog switches for the WASD and arrow keys for precise control, and quarter-size switches that fit four buttons into a single keycap, significantly expanding the keyboard’s functionality and versatility.
Why Ortholinear?
Ortholinear keyboards feature a grid-like layout where keys are aligned in straight columns and rows, creating a clean and simple look. This design simplifies the PCB layout and can improve typing accuracy and speed for some users. Unlike traditional staggered keyboards, which were designed to prevent mechanical jams in typewriters, ortholinear keyboards have no such constraints and offer a modern, efficient alternative.
Project Overview
KICAD for Motherboard Design
I used KICAD, an open-source electronic design automation (EDA) software, for designing the keyboard’s PCB. KICAD’s comprehensive tools allowed for intricate and precise design, including:
- Schematic Capture: Detailed and organized schematic diagrams.
- PCB Layout: Precise physical layout of the PCB.
- 3D Visualization: Preview of the design in 3D.
- Gerber File Generation: Files ready for PCB fabrication.
OpenSCAD for Custom Keycaps
For creating custom keycaps, I used OpenSCAD, a script-based 3D CAD modeler ideal for parametric design. OpenSCAD allowed for:
- Custom Shapes: Designing keycaps with specific shapes and profiles.
- Parametric Design: Quick adjustments by changing script parameters.
- 3D Printing: Generating STL files for rapid prototyping.
Design and Development Process
Schematic Design
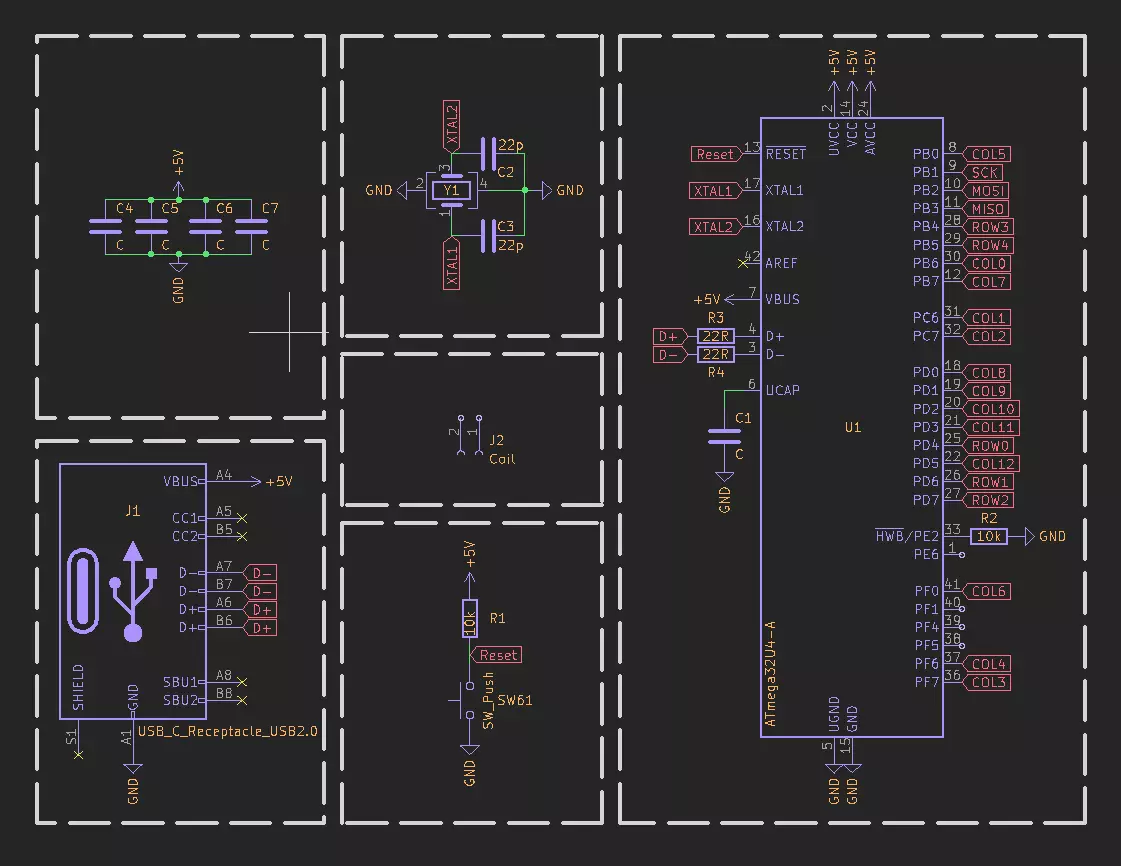
The heart of any custom keyboard project lies in the PCB design. Below is the schematic diagram of my custom ortholinear keyboard, designed using KICAD.
Microcontroller Unit (MCU)
At the core of the design is the ATmega32U4 microcontroller, chosen for its USB HID compatibility and multiple input/output operations.
USB Connection
The USB interface includes a USB Type-C connector wired for USB 2.0 functionality, providing power and data lines.
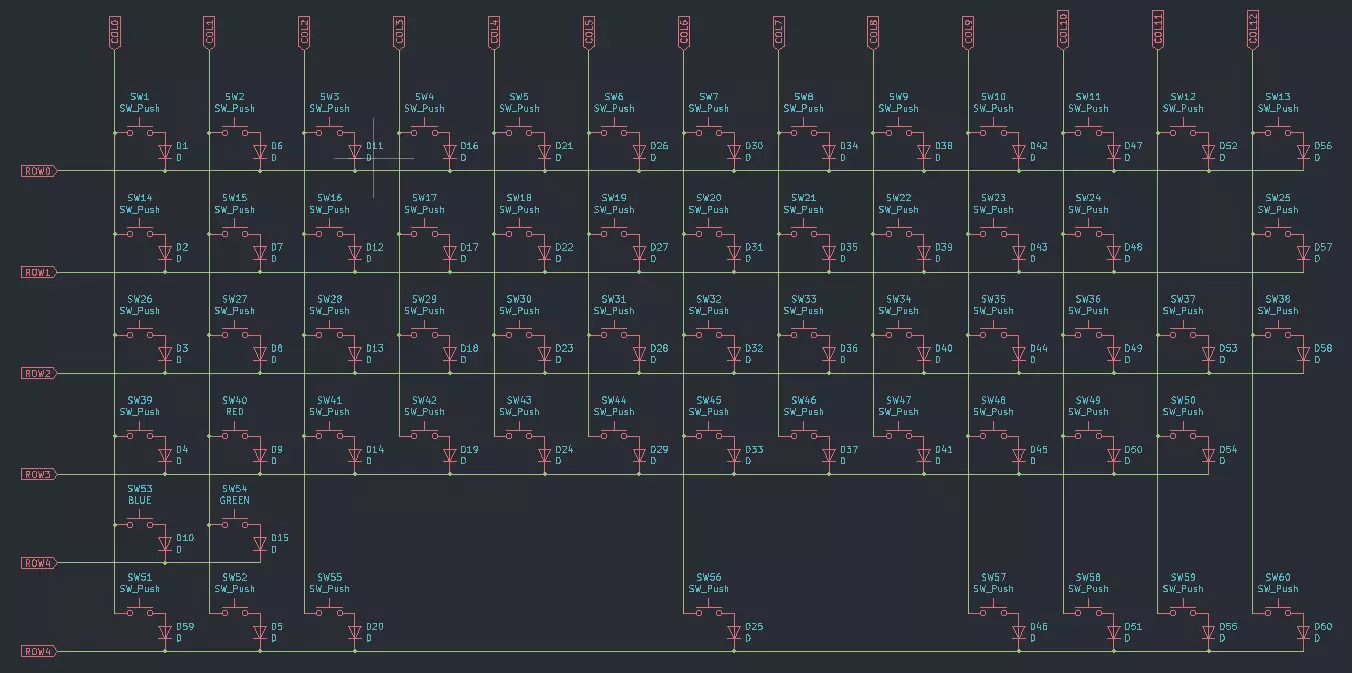
Key Matrix
The key matrix configuration is crucial for detecting key presses reliably.
Reset and Other Components
Includes a reset button, decoupling capacitors, and other essential components to ensure stable operation.
PCB Design
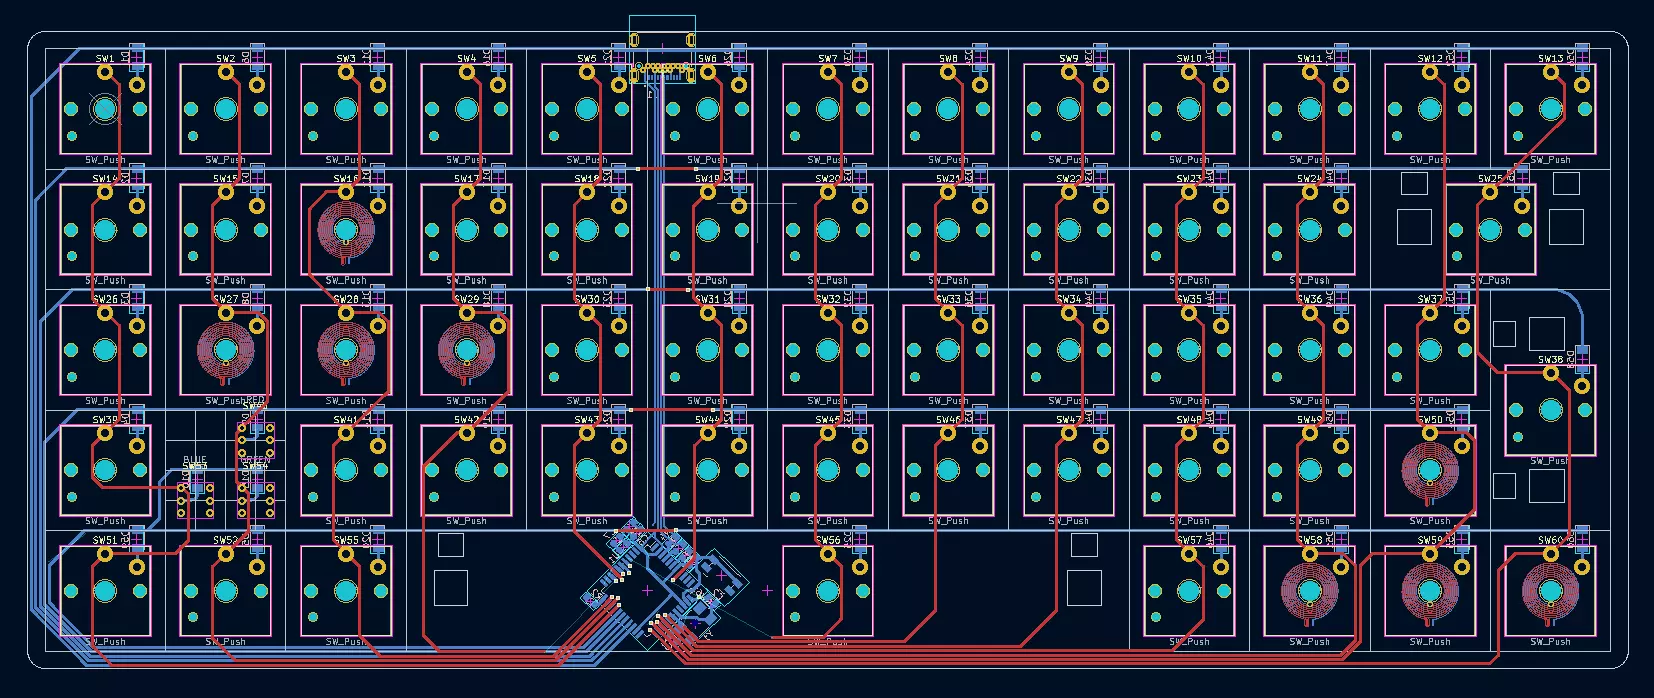
The PCB design focused on integrating Kailh Choc low-profile keyswitches and implementing a novel method for measuring analog keypresses using copper coil traces and the LDC1614 from Texas Instruments.
Kailh Choc Low-Profile Keyswitches
- Slim Design: Allows for a thinner, more portable keyboard.
- Durability: Ensures a long lifespan.
- Ease of Integration: Simplifies the design and manufacturing process.
Analog Keypress Measurement
- Copper Coil Traces: Inductive sensors detect changes in the magnetic field caused by the metal spring in the switch.
- LDC1614 Integration: Converts analog signals from the coils into digital data for precise keypress measurement.
Design Process
- Schematic Capture: Detailed connections between components.
- PCB Layout: Optimized placement and routing of traces.
- 3D Visualization: Ensures components fit together.
- Gerber File Generation: Files for manufacturing the PCB.
Manufacturing and Testing
- Prototyping: Testing the fit and function of the PCB.
- Testing: Fine-tuning the analog keypress measurement system.
Case Design
Parametric Design with OpenSCAD
OpenSCAD was used for designing key switches, enabling quick iterations and adjustments through parametric design.
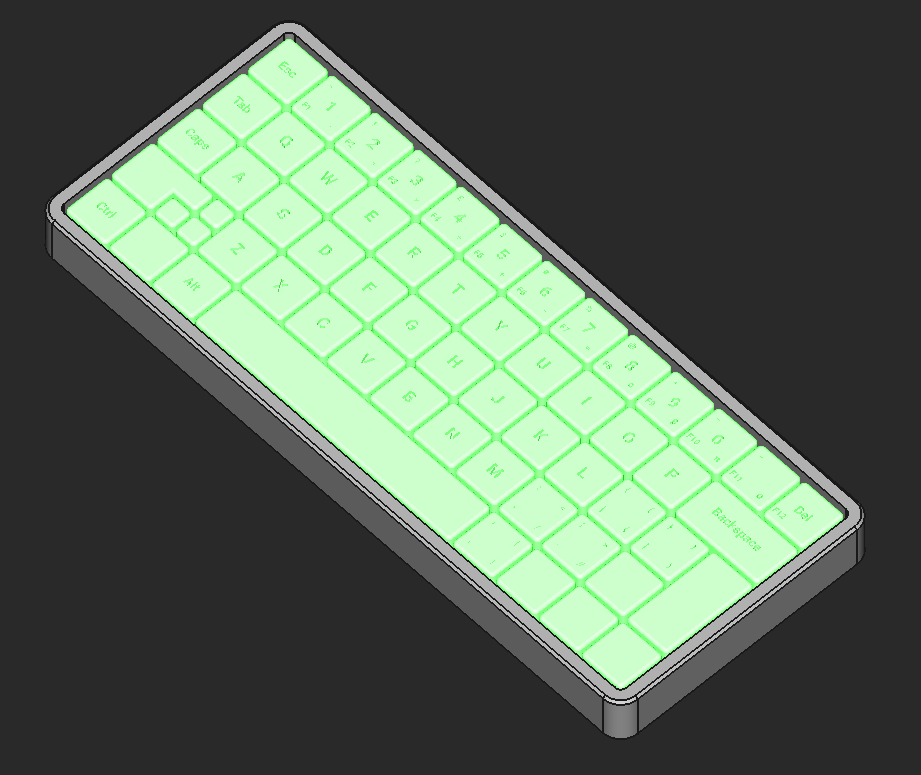
Creating the Outer Case with FreeCAD
FreeCAD was used for designing the outer case, providing detailed modelling and parametric features.
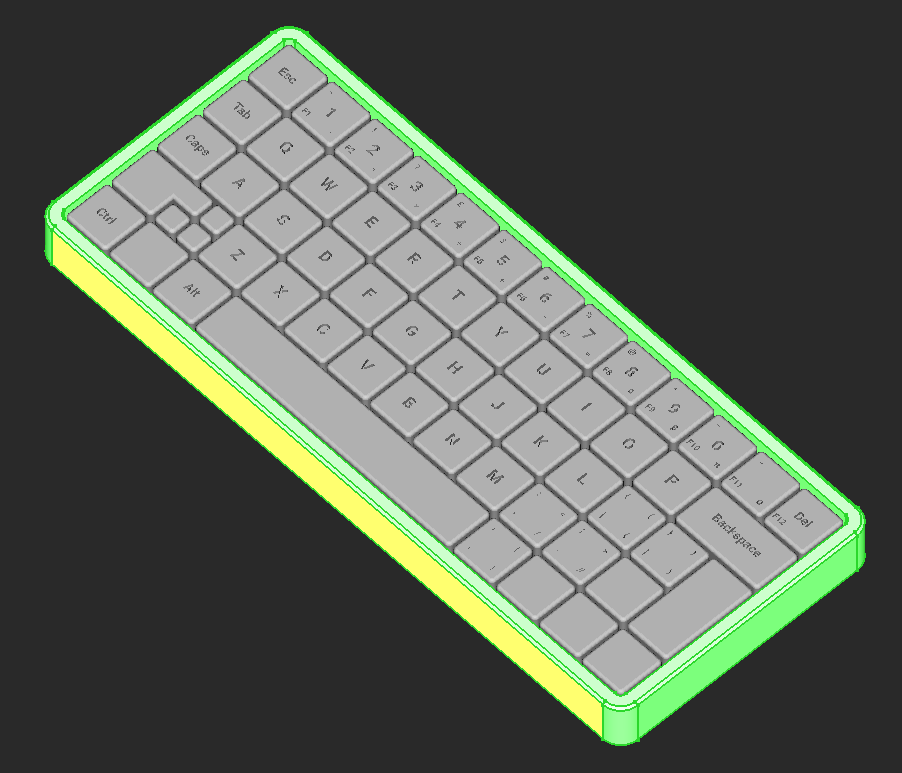
Material Selection and Manufacturing
The case and key caps were 3D printed using durable SLA for prototypes, with plans for aluminium or acrylic for the final version.
Assembly
Designed for easy assembly with snap-fit mechanisms, cable management, and access points.
In summary, the combination of KICAD and OpenSCAD provided a powerful toolkit for designing a custom, functional, and aesthetically pleasing keyboard. The parametric design capabilities ensured precision and flexibility, allowing for efficient prototyping and final production.